-
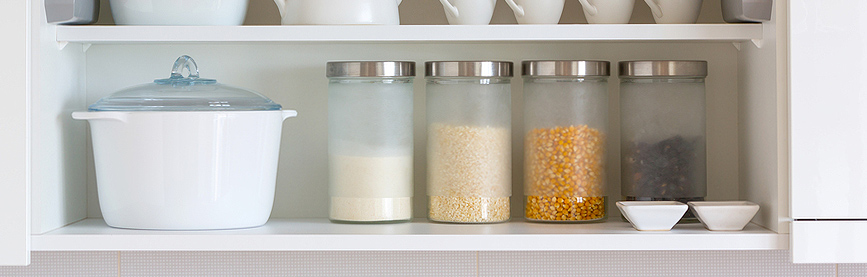
What size?
The sizes of kitchen cabinets are based on standard dimensions and elements. You can usually choose cabinet heights of 45, 75 and 90 cm and widths of 30, 45 and 60 cm.
-
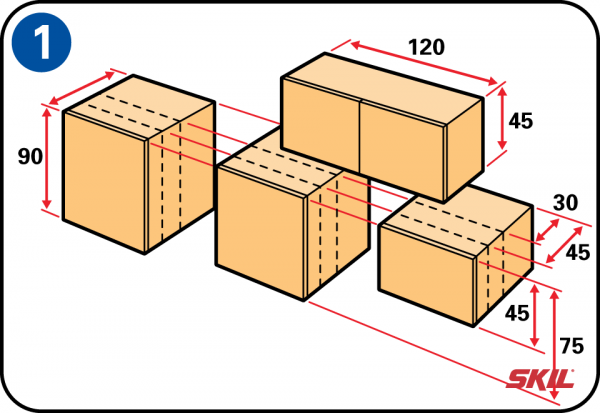
What height?
Top cabinets are usually fitted with the bottom edges at about 135 cm from the floor. This height leaves enough space for a bottom cabinet with worktop, if required, with a gap of 45 to 60 cm between the two. If you’re fitting the cabinet above a sink unit, you need to allow a space of 90 cm between them.
-
What finish?
You can choose from a wide range of finishing colors and materials for the front panel or door of the cabinet. The doors are almost always fitted with concealed hinges at the inside of the frame. Some rustical kitchen designs may use external hinges as a decorative element.
-
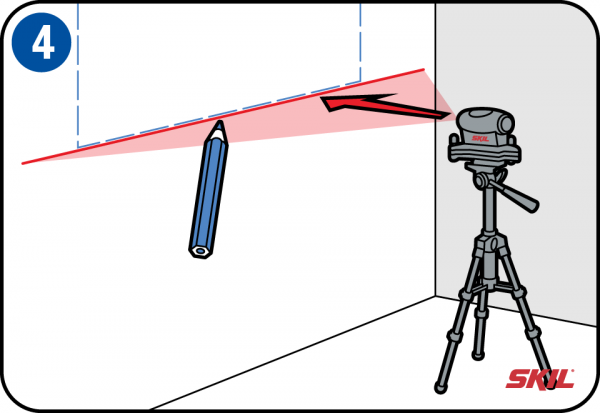
Mounting the cupboard
Mark out the exact position of the outside edges of the cabinet(s) on the wall. Make sure you choose the right height above the floor. At that height, draw a horizontal line using the spirit level. Or you can use a laser leveling tool for quick and accurate horizontal positioning. The mounting brackets are usually adjustable, so that after fitting them you can still adjust the position of the cabinet horizontally and vertically.
-
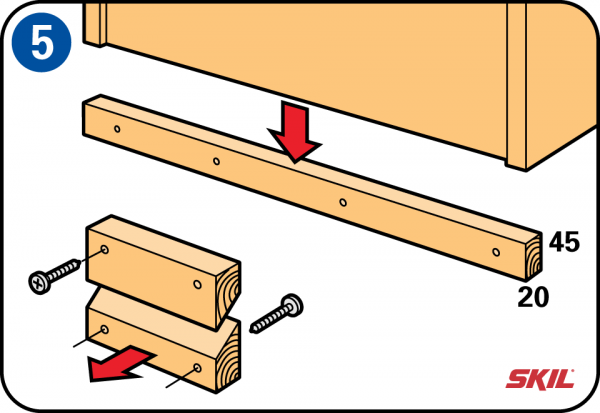
Perfectly straight
If you want to be perfectly sure the cabinet is horizontal, fit a wood batten with a cross section of about 20 x 45 mm under the line you’ve marked on the wall. This will support the cabinet while you’re mounting it. You can remove it afterwards and fill the holes. Mark out the mounting points for the cabinet on the wall to show where the brackets will be fixed.
Note: kitchen cabinets are supplied with different types of brackets and mounting systems. The simplest system uses wedge-shaped wooden blocks. If you’re using these you need to work very accurately, especially if you want to fit several cupboards next to each other in a straight line. -
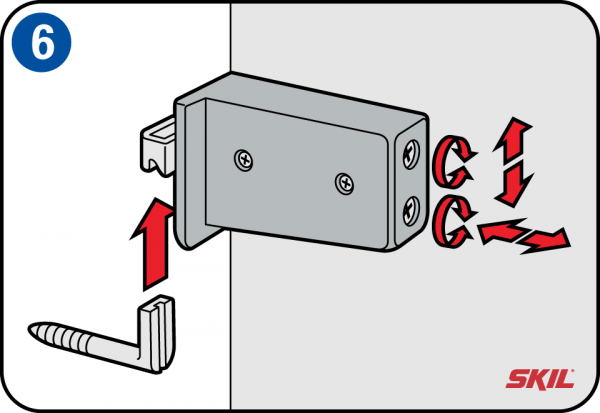
Use good wall plugs
Drill the required holes in the wall and insert the nylon wall plugs. Fit the supports supplied with the cabinet. Pay careful attention to the material of the wall. Use wall plugs of a good brand because they have to support the weight of the cabinet and all its contents! Then mount the cabinet on the wall. Each of the brackets inside the cabinet has two screws: one to adjust the height to make the cupboard horizontal, and the other to tighten the cabinet against the wall.
-
Fitting the doors
Next it’s time to fit the doors. You can choose the direction of opening, so consider carefully what works best – for example if you’ve fitted a cabinet in a corner. It also makes a difference if you’re right- or left-handed. Fit one part of the hinge to the inside wall of the cabinet, and the other part in the corresponding round recess in the door. Slide the two parts of the hinge into place and screw them together. The hinges are adjustable in three directions so you can hang the door perfectly straight.
-
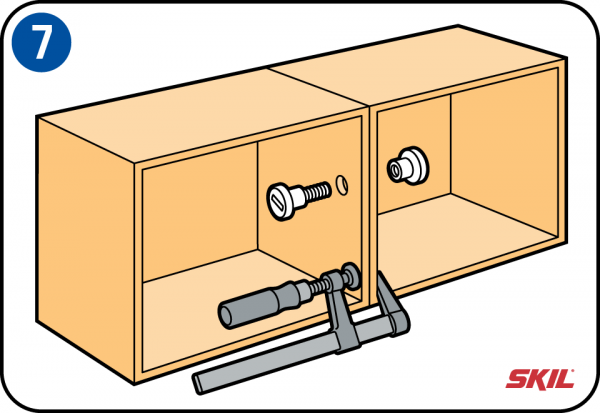
Fitting two cabinets next to each other
If you’re fitting two cabinets next to each other, you can fix them together. Use clamps to hold the cabinets together firmly. Then drill a hole through both cabinets and join the sides together with a nut and bolt. That will make sure the cabinets stay in place perfectly.
-
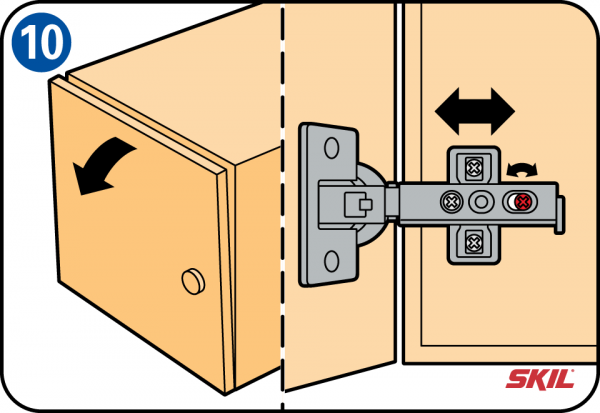
Adjusting the height
To adjust the height of the door, loosen the screws shown by the arrows. Then you can move the hinge up or down to get the right door height. Then tighten the screws again securely.
-
Straightening the door
If the door isn’t straight, you can adjust it with the screw shown by the arrow. First check if you need to adjust the door at the top or bottom hinge.
-
Adjusting the depth
You can adjust the depth of the hinges so the door fits flush against the cabinet. Loosen the screw shown by the arrow. Now you can move the hinge forward or backward until the door is flush. Then tighten the screw again.