-
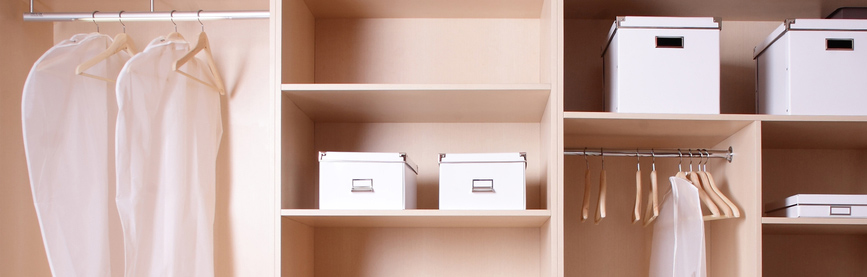
Shelf widths and spacings
The shelf widths and spacings don’t need to be the same everywhere. You can vary them to meet your own storage needs, for example by alternating the shelf depths, or by putting in one or two shelves that are less deep.
-
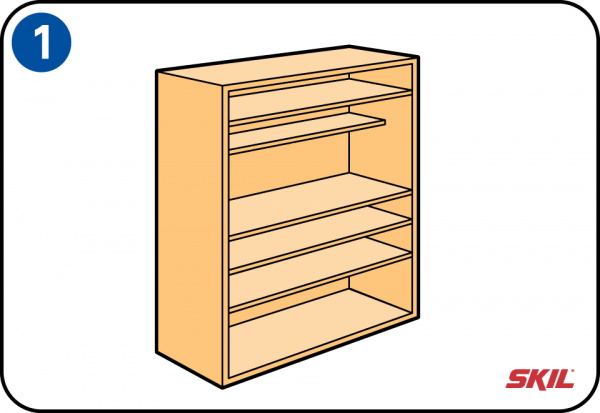
What kind of material
The most commonly used material for cupboard or wardrobe shelves is particle board. This is often finished with a veneer or plastic laminate surface on both sides. Particle board tends to bend even when it’s only lightly loaded. Gluing or screwing a strip of wood to the front and back edges of the upper surface is often enough to make the shelf stronger and stiffer.
-
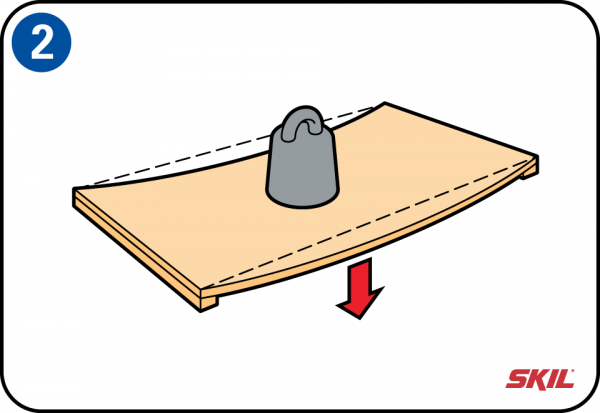
Sawing to size
First check with a try square that the cupboard or wardrobe walls are at right-angles to the back panel, and the back panel is flat. Measure the width of the top or bottom shelf to find the width of the new shelf. Then you can order it ready to use, or you can cut it to size yourself using a hand saw or electrical saw.
-
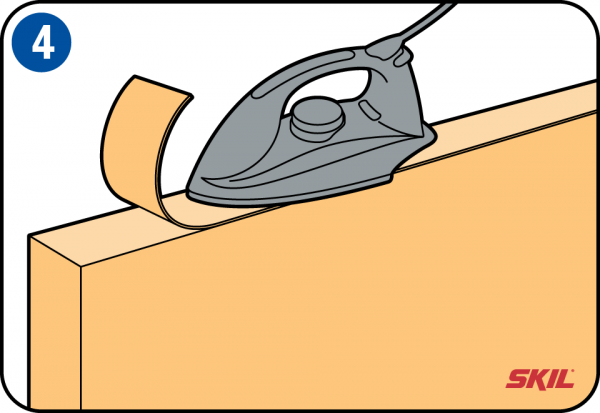
Veneer edging tape
If you’re using particle board with a veneer finish, the exposed edge after sawing isn’t so attractive. You can finish it using a matching iron-on veneer edging tape. Hold the tape in place and run over it with a hot iron so that it bonds to the edge of the shelf. Or of course you can cover the shelf with self-adhesive plastic foil, magazine pages or whatever you like.
-
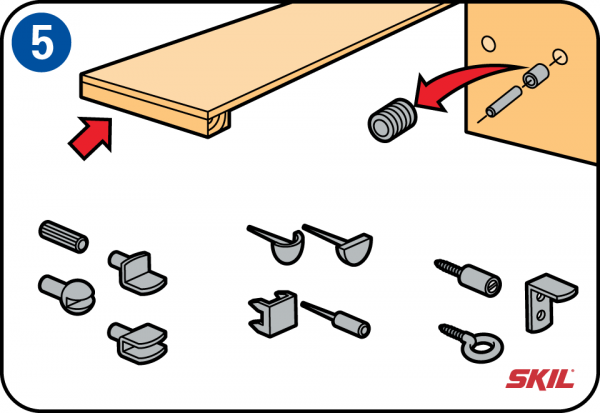
Shelf brackets
The next step is to fit the shelf brackets. There are different types, check which ones are already used in your cupboard or wardrobe. Some of the most common types are:
• Wooden supports that are screwed to the side panels. These have the same length as the depth of the shelf.
• Adjustable shelf systems. Drill holes in the side panel (not too deep) and insert sleeves into which pins are pushed to support the shelf. Or of course you can insert pins or wooden dowels directly into the side panels.
• Fixed supports or brackets secured by screws or nails, both to the side panels and under the shelf. -
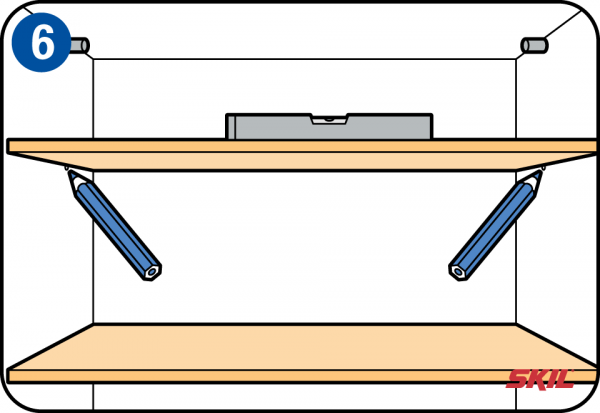
Positioning the shelf
Take care when marking the position of the supports on both side panels. If you just measure the distance from the top or bottom of the cupboard or wardrobe, that’s no guarantee that the shelf will be level. The best method is to put a spirit level on the shelf, hold it in place between the two side panels and mark off the right position. Or you can use an equal spacing between the two nearest shelves, measured from the top of the upper shelf.
-
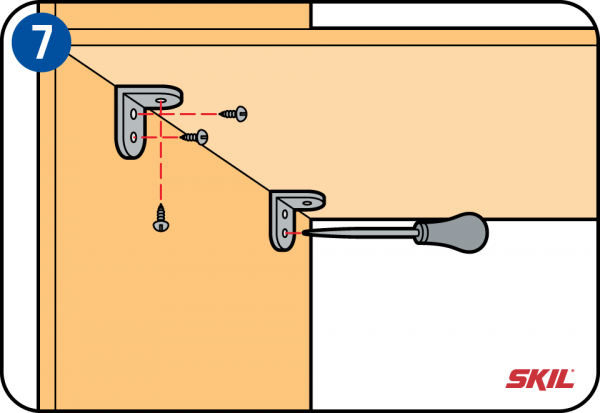
Screwing into place
Screw the supports to the side panels. Then place the shelf on the supports and use the awl to pierce small holes in the underside of the shelf. Screw the shelf into place using short, pointed screws.
-
Reinforcement
You can reinforce the shelves with extra wooden strips made of the same material as the shelves themselves. If you fix the strip at the front edge of the shelf, it will make the shelf look thicker. Use white wood glue and secure the strip in place with one or more wood clamps or a few screws.
-
Step tip
It’s often useful to fit shelves in a way that lets you store low and high things next to each other. That way you always have the right shelf space available. A short shelf with an extra vertical divider can then be a good solution.