-
Choosing the right place
Depending on the available space and your own preference, there are different ways to fit the curtain rail in front of the window.
1. On the window frame
The angle brackets are fitted to the window frame.
2. Inside the window frame
The mounting brackets are fitted inside the window frame, in front of the glass.
3. On the wall
The angle brackets are fitted against the wall, above the window.
4. From wall to wall
The angle brackets are fitted against the wall or ceiling, across the full width of the wall. With this mounting method you can hang the curtain so it covers the entire wall. -
What types of rails are available?
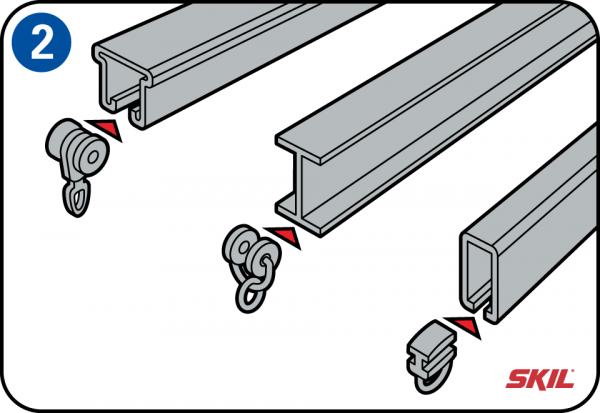
You can get different types of rails, brackets and runners based on two systems, in the same order as the illustrations;
Steel U-rail
The rollers and end-stops slide into the U profile, so they are less visible.
I-rail
The rollers and end-stops slide onto the lower edge of the I-profile, so they are visible from the outside.
Aluminium U-rail
The gliders and end-stops slide into the U-profile, so they are less visible. -
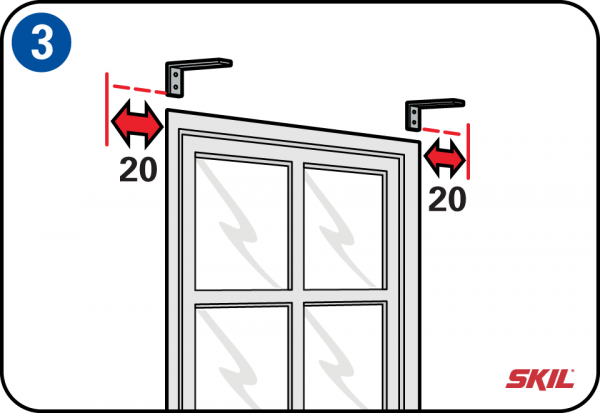
Measuring the rail length
To keep the curtains away from the window when they are open, you should add about 20 cm at each side. That means the rail is 40 cm longer than the width of the window, including the window frames. Fit the outer brackets at 10 cm from the ends of the rail, and use one bracket every 50 cm. This gives an attractive spacing and stops the rail from bending when the curtains are fitted.
-
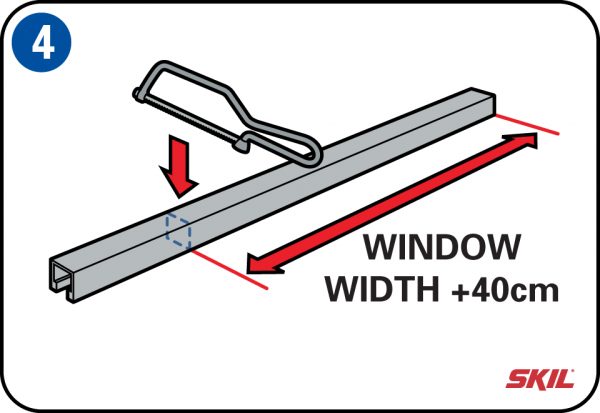
Saw the rail to size
Saw the curtain rail to the right size with the flat side facing upwards.
-
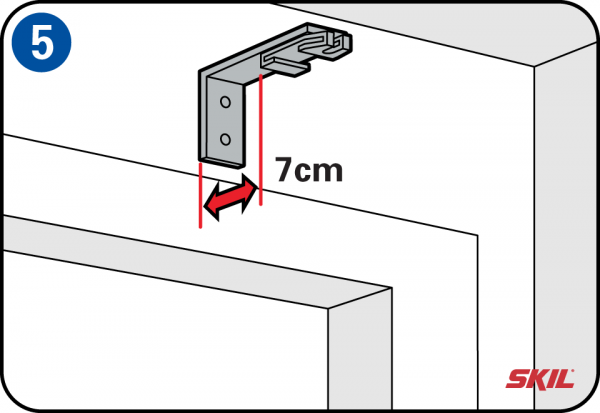
Gap between the rail and the wall
Fit the rail so the curtain hangs freely, with a gap of 7 cm between the curtain and the wall. If you use a double rail, for example for extra outer curtains, then add another 5 cm on top of the 7 cm.
-
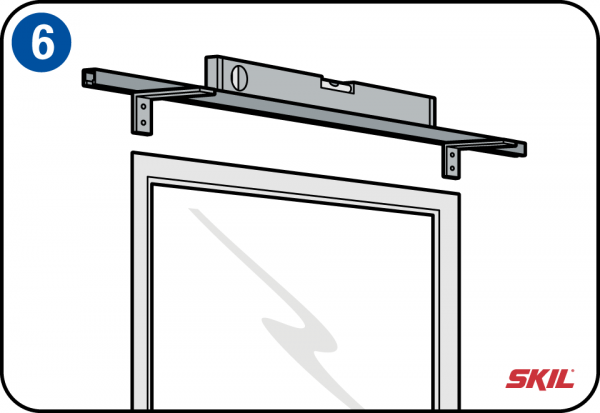
Mounting the rail brackets against the window frame or wall
Measure out the position of the first bracket, mark the holes and pre-drill them with a thin wood drill (if you are fitting the brackets to the window frame). If you are fitting the brackets to a masonry wall, use a 6 mm masonry drill with wall plugs. Then mount the first bracket, but leave the screws loose. Insert the rail in the bracket and position it horizontally using a spirit level. Now mark out the position of the second bracket. Make sure the brackets at the left and right sides are at the same distance from the window frame.
-
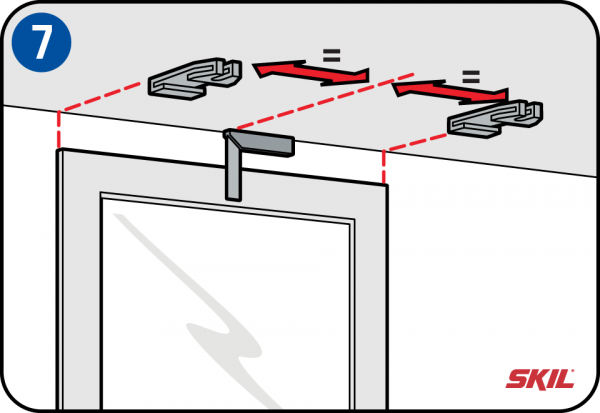
Mounting the rail brackets against the ceiling
Measure the center of the window frame and mark out the center of the rail on the ceiling (using a try square). From that point on the ceiling, measure the positions of the brackets at the left and right sides. Make sure there is a big enough gap between the bracket and the window so you can open and close the curtains freely. Special ceiling brackets are available for use with double curtain rails.
-
Step tip
Ceilings can also be made of hollow panels or plasterboard, for which you’ll need to use special toggle or butterfly plugs. See also the article ‘Step by Step working with wall plugs’. -
Runners, rollers, gliders and hooks
The curtain is hooked into the runners, rollers or gliders (see rail types). Different types of runners, rollers and gliders are available, but they all work in the same way. You pass one of the hooks through the hole in the curtain tape, tilt it forwards and slide it into or onto the runner. Then you screw end-stops onto the ends of the rail. These prevent the rollers from slipping out of the ends of the rail, and are available in different types to fit the rail you are using.
-
Fitting a pelmet
If you want to hide the top of the curtains from view, you can fit a pelmet or valance. If the pelmet is not too heavy you can fit it to the rail brackets using small additional supports or brackets. You can finish the ends of the pelmet neatly by folding or bending them back towards the wall.